

Remove the case. That single action is the fastest way to confirm whether your protective case is muffling your microphone. If the person on the other end of the call suddenly sounds like they can hear you properly, or your Voice Memo recording loses that “underwater” quality, the case is almost certainly the culprit. Repair shops report that the majority of muffled microphone complaints trace back to physical blockages: the case itself, trapped lint, or misaligned cutouts.
Before you read further, run this 30-second check:
- Remove your case completely.
- Open Voice Memos (iPhone) or a voice recorder app (Android) and record 10 seconds of speech.
- Make a short test call and ask the other person to rate your audio.
- Refit the case and repeat both tests.
If audio degrades the moment the case goes back on, you have your answer. The rest of this guide walks you through safe fixes, what to clean, how to choose a better case, and when to stop DIYing and book a repair.
Key takeaways
Removing the case and running a Voice Memo comparison is the single fastest way to confirm whether a protective case is muffling your microphone, and it costs nothing.
| Point | Details |
|---|---|
| Test first, always | Record a Voice Memo with the case on and off before attempting any other fix. |
| Clean before replacing | A soft brush and compressed air clear most lint blockages in under two minutes. |
| Check software too | Bluetooth routing, app permissions, and an outdated OS can all mimic a blocked mic. |
| Know when to stop DIYing | Persistent muffling after a drop or water exposure needs a professional diagnostic. |
| Choose the right case | Prioritise precision cutouts, slim bezels, and flexible TPU around microphone ports; SmartProtectors stocks and sources options built to these standards. |
Table of Contents
- Is your case muffling the microphone? How to run a reliable test
- Step-by-step fixes to try at home
- Why certain case designs tend to muffle microphones
- When cleaning and case fixes are not enough
- Safe do’s and don’ts for microphone care
- How to choose a replacement case that keeps audio clear
- External microphones and adapters as an alternative
- Cases with clear microphone access from SmartProtectors
- Sources
Is your case muffling the microphone? How to run a reliable test
The goal here is to isolate the case as the variable. One test is not enough; you want a sequence that rules out software and accessories before you blame the hardware.
-
Voice Memo before/after test. Record 10 seconds of speech with the case on, then again with it off. Save the files with names like
mic_case_onandmic_case_offso you can compare them side by side. Apple Support recommends removing accessories and using Voice Memos as the standard first step when audio problems appear. - Normal call vs speakerphone. Make a call in standard mode, then switch to speakerphone. Modern smartphones use multiple microphones positioned at the bottom, front, and rear for noise cancellation. If speakerphone sounds clearer, the bottom microphone port is likely obstructed.
- Wired headset test. Plug in a wired headset with its own microphone. If the caller can hear you clearly through the headset but not through the phone’s built-in mic, the phone’s microphone port is the problem, not the software.
- Disconnect Bluetooth devices. A Bluetooth headset or car kit can silently reroute audio away from the phone’s microphone. Disconnect all Bluetooth accessories and retest.
If audio is poor across all tests regardless of the case, the issue is likely software or hardware rather than the case itself. Android Authority notes that Bluetooth routing, app permissions, and outdated operating systems can all mimic a blocked microphone.
Pro Tip: Name your test recordings with a timestamp and case status (e.g. 2026-03-15_case_off) so you have a clear before/after record to play to a repair technician if DIY fixes do not work.
Step-by-step fixes to try at home
Work through these in order. Each step is reversible and safe. Stop and retest after every action.
- Remove the case and restart the phone. A restart clears any software state that might be misrouting audio. Test the microphone immediately after the reboot, before refitting the case.
- Check app microphone permissions. On iPhone, go to Settings → Privacy & Security → Microphone. On Android, go to Settings → Apps → [App name] → Permissions. Revoke and re-grant permission for any app that sounds muffled.
- Update the operating system. Device-specific repair guides consistently list outdated OS software among the top causes of microphone problems. Install any pending updates, then retest.
- Clean the microphone ports. Use a soft-bristled brush (a clean, dry toothbrush works well) to sweep debris away from the microphone grille in short, gentle strokes. Follow with a brief burst of compressed air held at least 10 cm from the port. Never use a metal pin or a cotton bud that could push lint deeper or puncture the internal mesh.
- Realign the case cutouts. Remove the case, refit it slowly, and check that every cutout sits directly over its corresponding port. Even a 1–2 mm shift in a silicone case can partially cover a microphone grille.
- Test with the case loosely fitted. Hold the case against the phone without snapping it fully into place. If audio improves, the case is applying pressure that seals the port.
- Trim the case bezel (last resort, with caveats). Some users carefully trim excess silicone from around the microphone cutout with small scissors. This can help, but it immediately voids any waterproof rating the case carries. Only attempt this if the case provides no IP-rated protection and you accept the trade-off.
Safety note from iFixit: Professional repair guidance explicitly warns against inserting metal objects into microphone ports or using liquid cleaners near ports. Both actions risk permanent damage to the internal mesh and the microphone capsule itself.
To verify each fix, repeat the Voice Memo and test call sequence from Section 2. A fix that works will produce a clearly audible improvement in the recording, not just a subjective sense that it “sounds better.”
Pro Tip: Ask the person on your test call to score your audio out of ten before and after each fix. A numerical score is far easier to compare than “sounds a bit better.”
Why certain case designs tend to muffle microphones
Sound reaches a smartphone’s microphone by travelling through the air and into a small port or grille on the device’s body. Anything that narrows, seals, or absorbs that air path reduces the signal the microphone receives. TechAdvisor confirms that misaligned cutouts, thick sound-absorbing materials, and debris-clogged grilles are the most common causes of that characteristic “underwater” audio quality.
The case types most likely to cause problems:
- Thick silicone cases. Dense silicone absorbs sound energy and, when cutouts are even slightly undersized, the material creeps over the port edge.
- Fully enclosed waterproof cases. Hermetic seals that keep water out also restrict the airflow sound waves need. Waterproof case designs often require precision-engineered acoustic channels or mesh membranes to compensate, and budget versions rarely include them.
- Folio and wallet cases. A front flap sitting across the bottom of the phone during a call can directly block the primary microphone. Even when open, the flap redirects sound reflections away from the port.
- Thick rubber bumper cases. The raised bezel around the bottom edge can create a partial acoustic seal against a flat surface (a desk, a palm) that muffles the mic during calls.
The physics is straightforward: sound is a pressure wave that needs an unobstructed path to reach the microphone capsule. Any material that covers, narrows, or absorbs that path reduces the signal before it even reaches the sensor.
Cases with acoustically transparent mesh over the microphone cutout, or with oversized cutouts that leave a clear air gap, avoid this problem almost entirely.
When cleaning and case fixes are not enough
If removing the case and cleaning the ports produces no improvement, the problem is likely inside the device rather than outside it.
Signs that suggest internal damage rather than external blockage:
- Audio quality is poor with the case off and the ports visibly clean.
- The problem started immediately after a drop or after the phone was exposed to moisture.
- Multiple microphones are affected (speakerphone, video recording, and calls all sound muffled).
- The phone shows other symptoms: distorted audio, crackling, or a microphone that cuts in and out.
A simple decision sequence: remove case → clean ports → retest → update OS → retest → disconnect Bluetooth → retest. If audio remains poor after all of these, the fault is almost certainly hardware.
iFixit’s repair guidance recommends professional diagnostic assessment after a drop or water exposure, because internal microphone damage is not visible and cannot be fixed at home. Bring your before/after Voice Memo recordings to the shop; they give the technician a clear baseline and speed up the diagnosis.
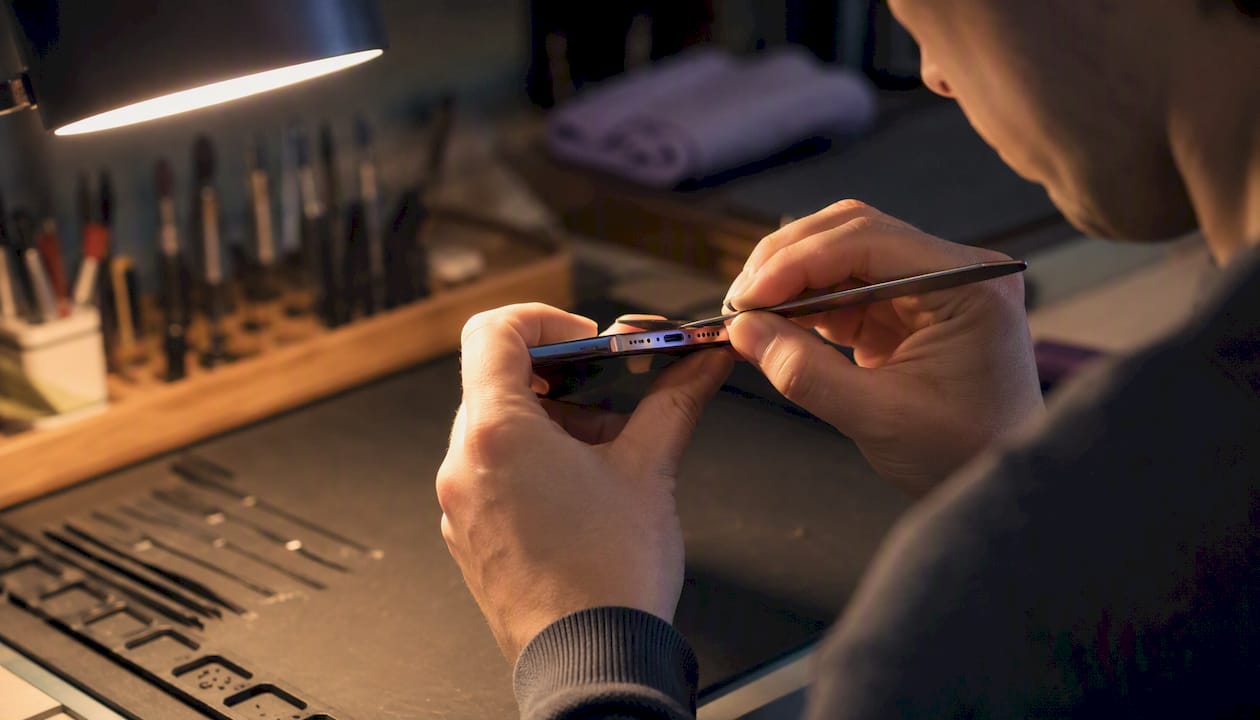
Pro Tip: If the phone has been exposed to water, power it off immediately and leave it off until a technician has assessed it. Running a wet device accelerates corrosion on the microphone contacts.
Repair costs for a microphone replacement vary by device model and region, but a diagnostic assessment at a reputable shop is usually low-cost or free and will confirm whether a repair is worth pursuing.
Safe do’s and don’ts for microphone care
Do:
- Use a soft-bristled brush or compressed air (held at a distance) to clear debris.
- Remove Bluetooth accessories before testing to rule out audio routing issues.
- Check app microphone permissions after any OS update.
- Test with a Voice Memo immediately after fitting any new case.
- Remove the case for important calls if you suspect it is causing problems.
Don’t:
- Poke the microphone port with a pin, toothpick, or any metal object. The internal mesh is fragile and damage is permanent.
- Drill holes into a case that provides waterproof or dust protection. Apple community threads show users attempting this fix, but it destroys the case’s protective rating and can introduce debris directly into the port.
- Use liquid cleaners, isopropyl alcohol sprays, or compressed air cans held too close. Liquid ingress and excessive air pressure both risk internal damage.
- Force a port cover open on a waterproof case. These covers are designed to be opened gently along their hinge.
Drilling or puncturing a protective case to improve microphone access is a false economy: you lose the protection the case was bought to provide, and you may push debris into the port rather than clearing it.
How to choose a replacement case that keeps audio clear
The right case protects the phone without compromising the microphone. Here is what to check before buying.
- Verify cutout accuracy. Look for cases described as having “precision cutouts” or “exact-fit ports.” Read customer reviews specifically for mentions of “muffled mic” or “blocked speaker” before purchasing.
- Choose thinner materials around ports. TPU (thermoplastic polyurethane) cases with slim bezels around the microphone area are less likely to creep over the port edge than thick silicone.
- Look for acoustic mesh or vents. Some cases include a fine mesh membrane over the microphone cutout that keeps dust out while allowing sound through freely.
- Test immediately on arrival. Record a Voice Memo the moment you fit a new case. If audio degrades, return the case before the return window closes.
- Check the manufacturer’s IP rating trade-off. A fully waterproof case will always involve some acoustic compromise. Decide whether you need waterproofing or microphone clarity more, and choose accordingly.
Features worth prioritising:
- Oversized cutouts that leave a visible air gap around the port.
- Flexible TPU rather than rigid, thick silicone around the bottom edge.
- A slim, drop-proof design with accurate port alignment.
- Customer reviews that mention clear call quality, not just drop protection.
A clear TPU case with airbag corners is often the best balance: flexible enough to absorb impacts, thin enough around the ports to avoid muffling, and transparent so you can see whether the cutouts are properly aligned before you even snap it on.
External microphones and adapters as an alternative
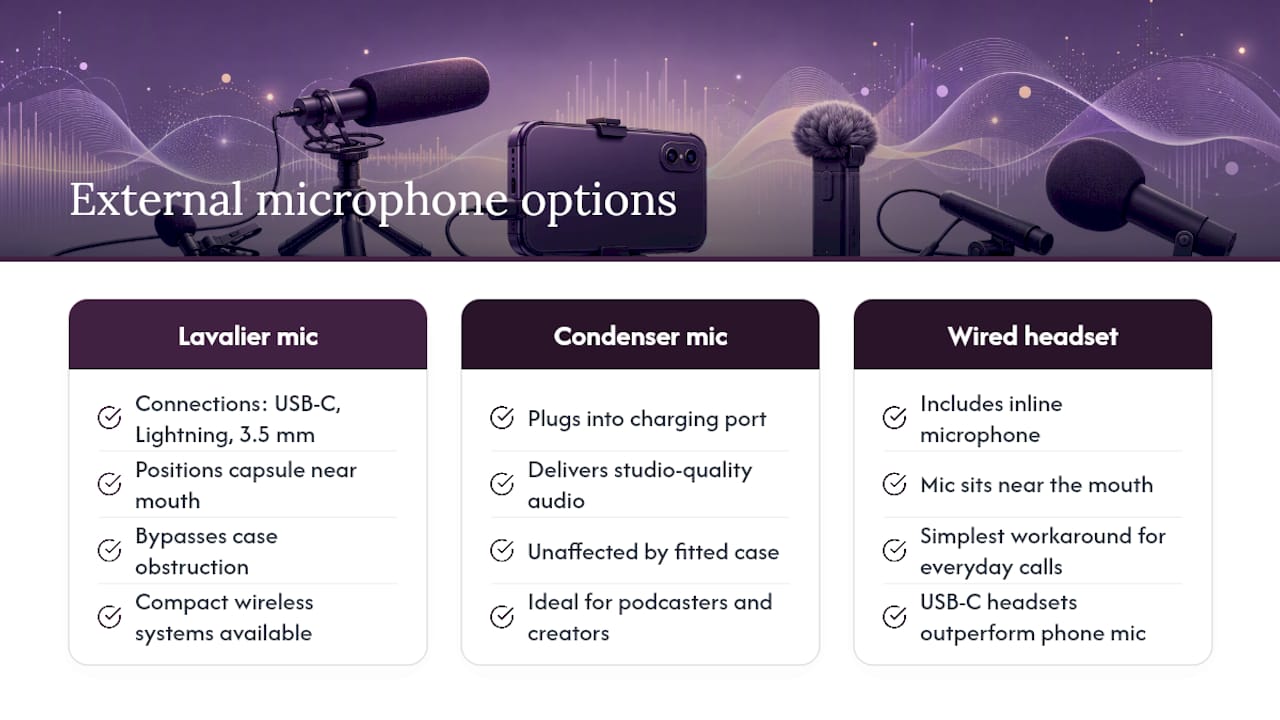
When a case is non-negotiable (a waterproof case on a diving trip, for example) and audio quality matters, an external microphone bypasses the phone’s built-in ports entirely.
A lavalier microphone (clip-on) connects via USB-C, Lightning, or a 3.5 mm adapter and positions the capsule close to the speaker’s mouth, well away from any case obstruction. For video calls and recordings, this is often the cleanest solution available. Brands such as Rode, DJI, and Hollyland make compact wireless lavalier systems that pair with smartphones without any app configuration.
A USB-C or Lightning condenser microphone plugs directly into the charging port and delivers studio-quality audio regardless of what case is fitted. These are particularly useful for podcasters or content creators who cannot remove their case between takes.
For everyday calls, a wired headset with its own inline microphone is the simplest workaround. The headset mic sits near the mouth and is entirely unaffected by whatever case is on the phone. Most modern USB-C headsets include a microphone that outperforms the phone’s built-in option in noisy environments anyway.
What actually works, and what people get wrong
Most muffled microphone problems are solved by two actions: removing the case and cleaning the port. That is not a guess; repair shop data consistently shows physical blockages account for the majority of muffled audio complaints. The fix is usually free and takes under five minutes.
What people get wrong is skipping the test sequence and jumping straight to conclusions. Someone blames a software bug, spends an hour in settings, and never thinks to check whether the case cutout has shifted 2 mm to the left. Someone else assumes hardware failure and pays for a repair that was never needed. The test-first approach in this guide exists precisely to prevent that.
The other common mistake is choosing a replacement case based on looks and drop-protection ratings alone, then discovering the microphone is muffled all over again. SmartProtectors designs cases with accurate port cutouts and slim bezels around microphone areas, because a case that muffles your calls is not actually protecting you from anything useful.
Cases with clear microphone access from SmartProtectors
If testing confirms the case is the problem, replacing it is the most reliable long-term fix. SmartProtectors stocks cases with precision-aligned cutouts and slim port bezels that keep microphone access clear without sacrificing drop protection.
The fashionable drop-proof leather case and the IMAK clear TPU case with airbag corners are two examples where the cutout geometry is built to leave a clear air gap around the microphone port. If your device model is less common and you cannot find a case that fits correctly, SmartProtectors offers a special-order sourcing service: submit a request and the team will locate and add the right product to the catalogue. Browse the full range at SmartProtectors and test your new case with a Voice Memo the moment it arrives.
Sources
- How to fix microphone issues on Android — Android Authority
- Locate microphones on your iPhone — Apple Support
- Fix your muffled phone microphone — Owl Repair Kennesaw