

A camera lens protector can absolutely cause flash glare, but usually only under specific conditions: a reflective or misaligned fit, trapped dust, or an extra reflective surface like an acrylic ring. Before you blame the protector, run a two-minute flash test comparing shots with and without it. SmartProtectors stocks anti-glare and low-profile options built to minimise this exact problem.
TL;DR:
- Flash glare caused by lens protectors often results from reflective surfaces, dust, or poor fit, especially at close range with a strong flash.
- Proper inspection includes testing with and without the protector, checking for halos or ghosting, and physically examining for trapped dust or uneven seating.
- Edge design and material quality are critical, as poorly finished edges or acrylic caps increase reflections, while dust and oil scatter light, creating haze or bright blobs.
- Maintenance like cleaning and reseating protectors can usually eliminate glare issues, with replacement needed only if problems persist across multiple protectors.
- Adjusting flash techniques, such as bouncing light or lowering flash power, generally reduces glare more effectively than changing protectors.
Table of Contents
- How to test if your lens protector is causing flash glare
- Why protectors create flare and glare in the first place
- Quick fixes: cleaning, reseating and hardware tweaks
- Flash and camera techniques that cut glare regardless of protector
- Choosing a protector material that won’t fight your flash
- Which SmartProtectors options actually help with flash glare
- Balancing protection and photo quality
- Get the right protector without the guesswork
- Sources
How to test if your lens protector is causing flash glare
You don’t need special kit to diagnose this. A phone, a dark room and five minutes will tell you whether the protector is the culprit or something else is going on.
1. Take a control shot. If you can remove the protector safely, take one flash photo with it on and one with it off, from the same distance and angle. If the glare disappears when the protector comes off, you have your answer.
2. Vary distance and angle. Shoot the same subject from close range (under a metre) and then from further back. Reflective glare from a protector tends to spike at close range because more flash light bounces straight back into the sensor.
3. Check for a halo versus multiple ghosts. A single soft halo around bright points usually points to a slightly domed or ill fitted protector. Multiple faint duplicate images, sometimes called ghosting, suggest light bouncing between two parallel surfaces, which is what happens when a protector sits with an air gap over the lens.
4. Inspect physically before you shoot again.
- Hold the phone under strong side light and look across the protector’s surface for dust, fibres or oil trapped underneath.
- Check whether a case rim or an acrylic lens cap is sitting close enough to the lens to catch flash spill.
- Run a fingertip lightly along the protector’s edge to feel for lifting or an uneven seat.
What the symptom tells you: a general soft haze across the whole frame usually means dust or oil scatter. Sharp, discrete blobs near the flash usually mean a reflective ring or cutout edge. Starburst patterns radiating from bright points often trace back to a scratched or lower-quality glass surface rather than the protector’s fit.
Why protectors create flare and glare in the first place
Every extra layer of material between the flash and the sensor adds a chance for light to bounce or bend before it reaches the lens. That’s the whole story in physics terms, and it explains almost every glare complaint SmartProtectors hears about.
A bare lens has one glass surface facing the world. Add a protector and you’ve introduced two more surfaces, front and back of the film or glass, each capable of reflecting a fraction of the flash back toward the sensor. On a dark subject at close range, that reflected sliver of light is often the brightest thing in the frame, which is exactly why it shows up as a blob or halo in photos taken in low light.
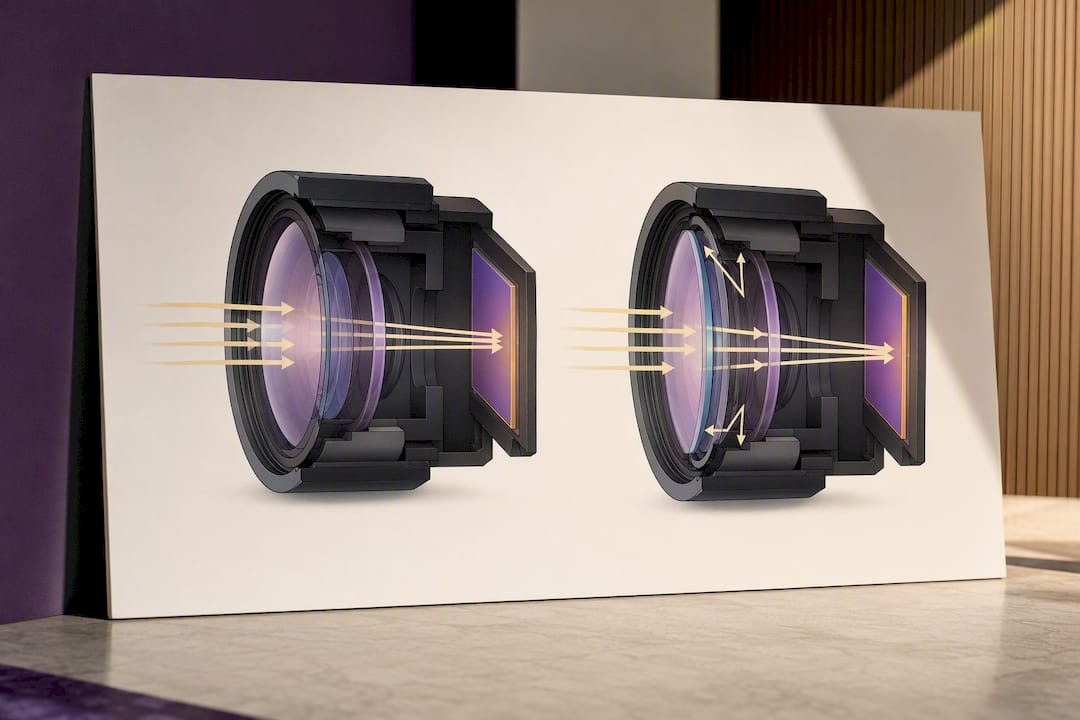
Edge design matters just as much as the flat surface. Protectors with a raised or reflective ring around the camera cutout concentrate light at that border, and it shows up as a bright crescent or ring artefact in the corner of flash shots. Adorama’s guide to lens filters notes that protective filters and covers typically don’t alter an image when they’re optically flat and properly finished, but a poorly seated or badly cut edge is a different story. Acrylic lens caps, often bundled with tempered glass protectors for extra coverage, add yet another reflective surface, which is why owners occasionally report a bright dot appearing in exactly the same spot on every flash photo.
Then there’s dust. Even microscopic particles or a thin film of oil trapped between the lens and the protector scatter flash light in every direction, creating a soft haze that’s invisible in daylight but glaring in a dark room. Online reports on forums like Reddit repeatedly describe this exact “hazy blob” artefact tied to tempered glass or acrylic bump protectors, which lines up with what the optics predict.
If glare appears identically whether the protector is on or off, the fault sits with the phone’s own lens coating or a scratch, not the accessory.
Quick fixes: cleaning, reseating and hardware tweaks
Most glare problems clear up with maintenance, not a new purchase. Work through this in order before you assume you need a replacement.
- Clean properly. Use a dry microfibre cloth first. If residue remains, apply isopropyl alcohol sparingly to a fresh section of cloth, never directly onto the phone, and finish with a blower or compressed air to clear loose dust from the cutout edge. Avoid paper towels and household cleaners; both leave micro scratches that create their own glare.
- Lift and reseat the protector. Gently peel one edge, check the adhesive or lens ring for trapped fibres, and press it back down starting from the centre outward so no air pocket forms near the camera cutout. An uneven seat, even by a fraction of a millimetre, is enough to cause a visible reflection band.
- Remove the case temporarily. Some case rims sit just close enough to the lens to catch flash spill and bounce it back. Shoot a test photo with the case off; if the glare vanishes, the case, not the protector, is the problem.
- Take off any acrylic lens cap. If your protector includes a separate acrylic ring or cap, remove it and re-shoot. This single test isolates one of the most common glare sources instantly.
If glare persists after cleaning and reseating, and it’s consistent across multiple protectors of the same design, replacement is the only reliable fix. Look for a protector rated for precise cutout alignment and a genuinely flush, low-profile fit rather than one with a raised or glossy edge ring.
Pro Tip: Keep the removed protector’s packaging until you’ve run the full flash test. If a fresh replacement shows the same glare in the same spot, the issue is very likely your phone’s lens coating, not the protector, and no accessory will fully fix it.
For a deeper look at how trapped particles cause visible artefacts, SmartProtectors has a dedicated guide on dust under screen protectors that applies equally to lens covers.
Flash and camera techniques that cut glare regardless of protector
Hardware fixes only go so far. Changing how you fire the flash often reduces glare more than swapping the protector ever will.
- Bounce the flash instead of firing it straight on. Reflecting light off a ceiling or nearby wall softens the beam considerably, and Amateur Photographer’s flash photography guide confirms bounce flash is one of the most reliable ways to cut harsh glare and shadow. Nikon’s own guidance backs this up, noting direct on-camera flash produces flat, harsh light that increases the chance of glare.
- Lower flash power or switch to TTL metering. At close range, full-power flash is almost always overkill, and it’s the extreme brightness that turns a subtle reflection into an obvious blown-out patch. SLR Lounge’s beginner flash guide recommends dialling back power or letting TTL metering handle exposure automatically to avoid this.
- Angle your light source deliberately. Positioning a light roughly 6 to 12 inches above the subject’s head height with a slight downward tilt produces flattering shadow without the direct, flat glare of head-on flash.
- Don’t expect a polarising or ND filter to solve this. Polarising filters cut reflections from glass, water and other non-metallic surfaces, and they’re excellent for outdoor glare. But they do little against reflections generated by an on-axis flash bouncing off an extra protector surface, since the geometry that makes polarisers work depends on the angle of ambient light, not a flash mounted inches from the lens.
Balancing ambient exposure so the subject sits slightly above the background, rather than significantly brighter, also makes any residual flare far less noticeable in the final shot.
Choosing a protector material that won’t fight your flash
Not all protectors behave the same way under flash, and the right choice depends on what you shoot more often: casual snapshots or frequent low-light flash photography.
- Anti-glare or matted PET film diffuses specular highlights rather than reflecting them as a sharp point, which is genuinely useful for flash-heavy shooting. The trade-off, as Adorama notes, is a slight softening of micro-contrast and fine detail compared with clear glass.
- Clear tempered glass keeps images sharp but reflects noticeably if the cutout ring sits proud of the lens or the fit is even slightly off centre.
- Edge finish and cutout precision matter more than the base material. A cheaply cut clear protector will glare far more than a well finished one, regardless of what either is made from.
- Acrylic lens caps, often paired with tempered glass for full coverage, add an extra reflective surface and are the first thing worth removing during troubleshooting.
- Casual users who rarely shoot with flash in the dark can prioritise maximum protection with clear tempered glass. Anyone shooting flash photos regularly, events, low-light social shots, night photography, should lean toward anti-glare film or a verified low-profile fit.
SmartProtectors breaks down these trade-offs in more depth in its guide to choosing an anti-glare screen protector, which covers the same appearance trade-offs for front screens.
Which SmartProtectors options actually help with flash glare
SmartProtectors carries protector types built around exactly the fit and finish issues that cause flash glare in the first place, rather than generic one-size covers.
- The Anti-glare Matted Explosion-proof PET Film for iPhone 15 / iPhone 15 Pro diffuses specular flash returns, making it a solid pick if you photograph frequently in low light and want fewer hard reflections.
- The Spigen GLAS.tR EZ Fit Sensor Protected Screen Protector for iPhone 17 Series is a low-profile tempered glass design with accurate sensor cutouts, which reduces the edge-ring reflections that cause bright crescents near the camera module.
- The Full Coverage Shockproof Tempered Glass Screen Protector with Installation Tool for Samsung Galaxy S24 Ultra ships with an alignment tool, which matters because a precise seat is what prevents the air-gap ghosting described earlier.
- The IMAK Anti-scratch Ultra Clear Camera Lens Protector for Samsung Galaxy S23 Ultra, available with an integrated tempered glass film and acrylic lens cap, suits anyone who wants maximum coverage but should be tested with the cap removed first if glare shows up.
| Product | Best suited for |
|---|---|
| Anti-glare Matted PET Film (iPhone 15/15 Pro) | Frequent low-light flash photography |
| Spigen GLAS.tR EZ Fit (iPhone 17 Series) | Precise sensor fit, minimal edge reflection |
| Full Coverage Tempered Glass with Tool (Galaxy S24 Ultra) | Accurate alignment on install |
| IMAK Ultra Clear + Acrylic Cap (Galaxy S23 Ultra) | Maximum coverage, test cap separately |
For correct fitting from the outset, SmartProtectors’ step-by-step installation guide covers the alignment technique that prevents most trapped-dust and air-gap problems before they start. If your device isn’t listed in the catalogue, SmartProtectors’ sourcing service can locate and add a fitted protector for less common models on request.
Balancing protection and photo quality
Every protector is a compromise between safeguarding the lens and keeping the flash path perfectly clean, and pretending otherwise does readers no favours. Anyone who shoots flash photos most days, events, low-light portraits, should weight that decision toward an anti-glare finish. Anyone who mainly wants a scratch-free phone for daily life can accept clear glass and troubleshoot glare only if it actually appears.
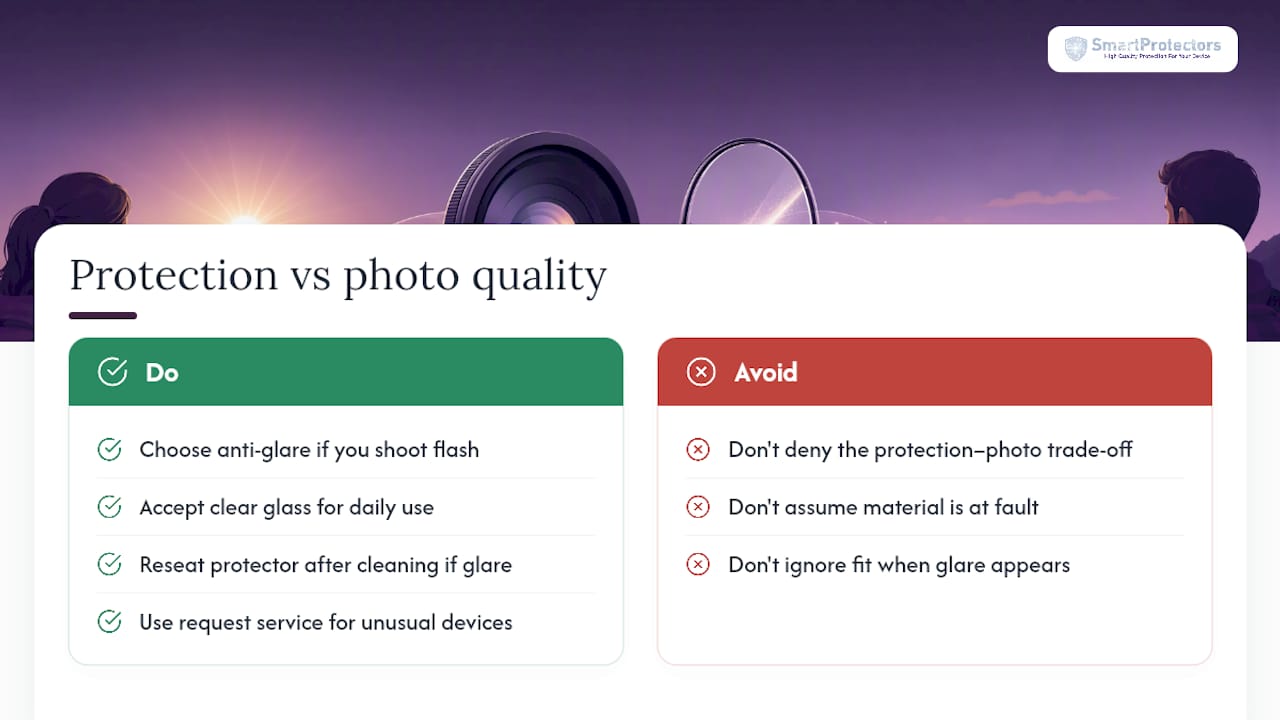
I’ve seen the trapped-dust scenario play out more than once: a protector that looked spotless under normal light produced a persistent hazy blob in every dark-room flash shot, and reseating it after a proper clean solved it completely within minutes. It’s rarely the material at fault. It’s usually the fit.
If your device isn’t a mainstream model, SmartProtectors’ request service exists precisely so an unusual phone or tablet still gets a protector matched to its camera layout.
— Dian
Get the right protector without the guesswork
SmartProtectors stocks the anti-glare and low-profile protector types this guide recommends, and can source a fitted option for less common phone models on request. If flash glare showed up in your test earlier, the practical route is straightforward: clean and reseat first, then move to a protector built for optical clarity rather than one that adds unnecessary reflective surfaces.
Start with the Anti-glare Matted Explosion-proof PET Film for iPhone 15 / iPhone 15 Pro if flash-heavy shooting is a regular thing for you, or the Spigen GLAS.tR EZ Fit Sensor Protected Screen Protector for iPhone 17 Series for a precise, low-profile fit around the camera sensor. Samsung owners fitting a new device should look at the Full Coverage Shockproof Tempered Glass Screen Protector with Installation Tool for Galaxy S24 Ultra, which comes with the alignment tool that prevents most seating problems from the start. Run the flash test, clean and reseat what you already have, and if glare persists, browse the full SmartProtectors catalogue for a fit matched to your exact model.
Sources
For deeper detail on the methods referenced above: Amateur Photographer’s flash guide covers bounce technique, SLR Lounge explains TTL exposure control, and Kase Filters details what polarising filters can and cannot fix.
- The ultimate guide to flash photography | Amateur Photographer
- Beginner’s guide to flash photography - Tips, tricks and lessons | SLR Lounge
- The basics of flash photography | Nikon
- A beginner’s guide to camera lens filters | Adorama