

The safest way to remove a screen protector is to lift one corner with a fingernail or thin tape tab and peel it away slowly on a diagonal, keeping the angle low and even. If the protector is cracked tempered glass, tape over the cracks first and wear gloves before you touch it. Whatever you’re removing, switch the device off first to stop stray taps registering while you work.
Three things to sort before you start:
- Power down the device and take the case off so you’re working on a bare, stable surface.
- Never use metal tools (knives, tweezers, paperclips) anywhere near the glass.
- Keep gloves within reach if the protector is cracked, chipped, or shattered.
Get those three right and the rest of the job is mostly patience.
Key Takeaways
Removing a screen protector safely comes down to peeling slowly from a corner, using tape and low heat only when needed, and never letting a metal tool near the glass.
| Point | Details |
|---|---|
| Power off first | Switch the device off before touching the protector to stop accidental taps mid-peel. |
| Peel diagonally, not upward | A steady low-angle diagonal peel spreads pressure evenly and avoids concentrated force on one spot. |
| Tape cracked glass before touching it | Criss-cross tape over cracks keeps shattered fragments together and protects your hands. |
| Use heat sparingly | Hold a hairdryer around 15cm away in short 10 to 20 second bursts, never lingering on one area. |
| Clean with 70% isopropyl only | Wipe residue with alcohol on a microfiber cloth, never poured directly onto the screen, before fitting a replacement from SmartProtectors. |
Table of Contents
- Tools and prep needed for safe screen protector removal
- How do you peel off an intact screen protector?
- How do you remove a cracked or shattered glass protector safely?
- What if the protector won’t come off?
- How do you clean the screen before fitting a new protector?
- What mistakes cause the most screen damage?
- Sources
- FAQ
Tools and prep needed for safe screen protector removal
You don’t need anything specialist. Most of this is already in a kitchen drawer or bathroom cabinet.
- A short length of tape (masking or Sellotape) to make a lift tab
- A thin plastic card (an old loyalty card works better than a bank card, which you don’t want to scratch)
- A microfiber cloth for wiping down afterwards
- A hairdryer on its lowest heat setting
- 70% isopropyl alcohol wipes for the residue stage
- Nitrile or work gloves, essential if there’s any cracked glass involved
Work on a clean, dust-free surface with decent light, ideally a table rather than your lap, where dust and pet hair have less chance of settling on the exposed screen. Turn the phone off and switch on do not disturb if you’re leaving it powered up for any reason, so a stray notification doesn’t light up the screen mid-peel.
Pro Tip: Wipe the surface you’re working on with a damp cloth first. A dusty desk is the single biggest reason new protectors end up with trapped specks underneath once you’ve fitted the replacement.
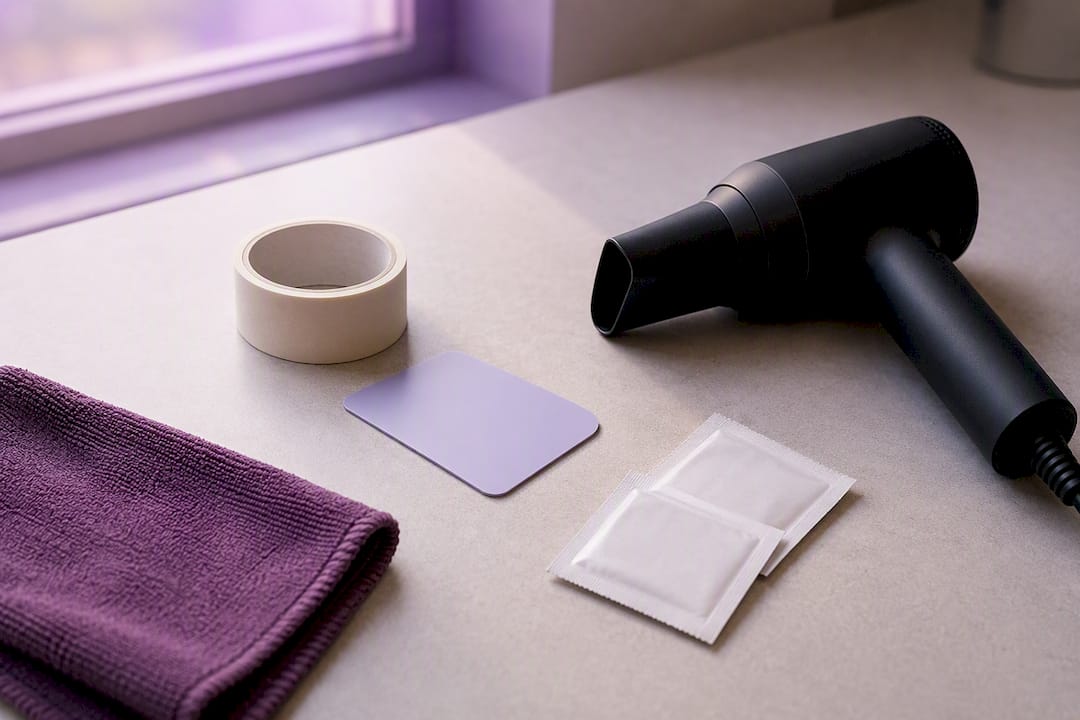
Each tool earns its place. Tape gives you a controllable edge to pull from instead of scraping at the glass with a fingernail. The plastic card slides under stubborn corners without the risk a metal edge carries. The hairdryer loosens adhesive that’s cured hard over months of use. And isopropyl wipes are there for the final stage, not the peel itself, so resist the urge to spray anything on the screen before you’ve got the protector off.
How do you peel off an intact screen protector?
Most screen protectors, film or unbroken glass, come off in under a minute if you follow the sequence in order rather than rushing the peel.
- Switch the device off and remove any case, then lay the phone flat on a stable surface.
- Find a corner where the protector edge is slightly raised, usually near the bottom where fingers rest most.
- Get a fingernail under it, or press a short strip of tape onto the corner and lift that instead if your nails aren’t up to the job.
- Slide a thin plastic card underneath once you’ve got a small lip, working it a few millimetres further under the edge.
- Peel diagonally, not straight up, keeping a steady low angle across the whole surface rather than yanking at one point.
- Pause at resistance. If it grips hard in the middle, don’t force it. Reposition the card, or move to gentle heat, and try again from that spot.
Starting at an edge and peeling slowly is the step most people rush, and it’s the one that causes almost every scratch. A protector that’s been on for a year or more has adhesive that’s had time to bond properly, and pulling straight up concentrates all the force on one point instead of spreading it along the peel line.
If you hit a patch that won’t budge, don’t add force. Warm that section for a few seconds (more on that below) and go back to the card. Diagonal, unhurried peeling with the card doing the lifting rather than your fingers keeps the pressure off the glass underneath, which is really what you’re protecting the whole time. The protector is disposable. The screen isn’t.
Once it’s off, resist touching the exposed screen with bare fingers straight away, oils transfer fast and you’ll just be cleaning them off again in the next step.
How do you remove a cracked or shattered glass protector safely?
Cracked tempered glass changes the job completely, because now you’re handling something that can shed sharp fragments rather than peeling cleanly.
- Tape over every crack before you touch it. Run strips across the whole surface, criss-crossing if the damage is bad, so fragments stay bonded to the tape rather than falling loose.
- Put gloves on. Even hairline cracks can have edges sharp enough to nick skin once you start lifting sections.
- Start from the least damaged corner, creating a small tape tab there the same way you would for an intact protector.
- Use short bursts of low heat (a few seconds at a time) to soften the adhesive if a section resists, then lift again rather than pulling harder.
Taping cracked glass before removal keeps the whole piece intact enough to lift in fewer, larger sections instead of a dozen loose shards. It also means if a piece does come away separately, it’s stuck to tape rather than sitting loose on your desk or falling into a keyboard.
Keep the heat brief and well clear of the camera cutout and any port openings, since prolonged warmth close to these spots risks affecting seals or internal components rather than just the adhesive layer.
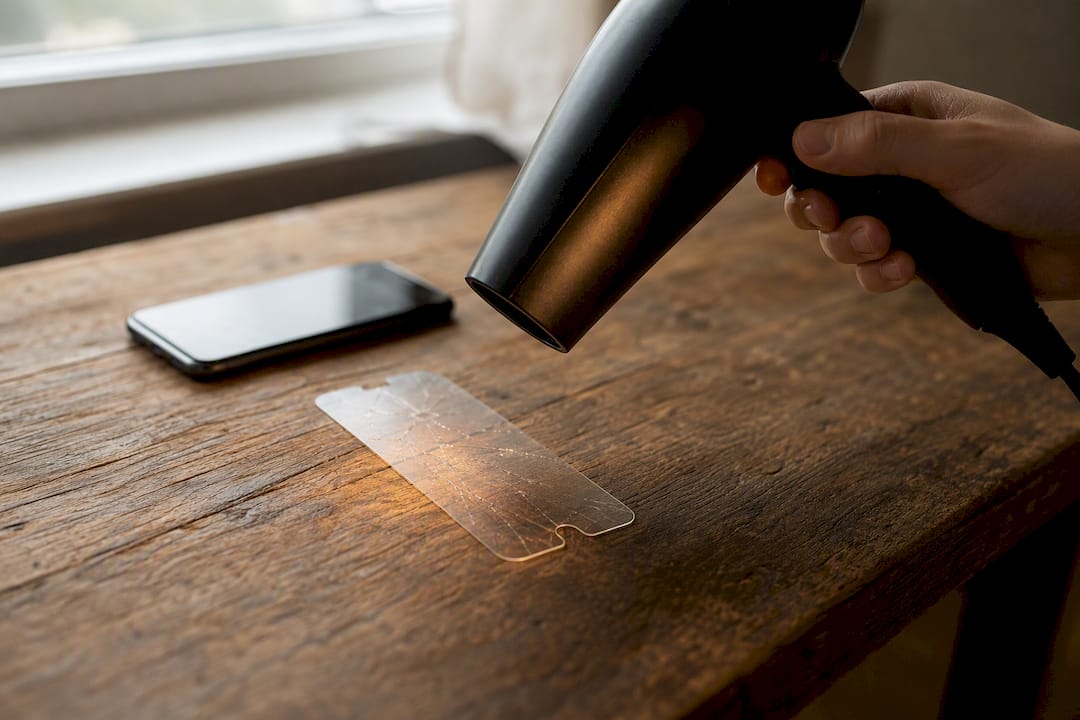
Pro Tip: If the glass feels fused to the screen itself, rather than just stuck via adhesive, stop. That usually means the impact that cracked the protector also affected the display underneath, and a repair technician needs to look at it before you do anything else.
What if the protector won’t come off?
Some protectors, particularly older film ones or budget glass with stronger adhesive, just won’t lift no matter how careful the initial peel is. This is where a lot of people reach for a knife blade, and it’s exactly the point to stop and slow down instead.
- Hairdryer method: hold it roughly 15cm (6 inches) from the screen, lowest setting, moving constantly in 10 to 20 second bursts rather than holding it still on one spot.
- Warm towel alternative: a towel warmed on a radiator (not the microwave) laid over the screen for a minute achieves a similar softening effect without any risk of overheating.
- Tape-tab method: fold a loop of tape sticky-side out, press it firmly onto the stuck corner, and pull. It often grips better than a bare fingernail.
- Controlled card pressure: work the plastic card in small increments rather than shoving it under in one go, which is what typically chips the protector or marks the bezel.
What to avoid entirely: metal prying tools of any kind, razor blades, holding heat on one spot for longer than 20 seconds, and forcing a corner that hasn’t actually lifted yet. None of these save real time, and all of them raise the odds of a scratch you can’t undo.
How do you clean the screen before fitting a new protector?
Getting the old adhesive off properly matters more than most people expect, since any residue left behind is exactly what causes bubbles and dust patches under the new protector.
- Apply 70% isopropyl alcohol to a microfiber cloth, never directly onto the screen, and wipe in gentle circular motions until the residue lifts.
- Use a small piece of tape to lift stubborn sticky patches the alcohol doesn’t fully shift on the first pass.
- Keep liquid away from ports, the speaker grille, and the camera housing, working from the centre outward rather than dabbing near openings.
- Let it dry fully before checking for lint in good light, ideally in a room without a fan or open window stirring up dust.
70% isopropyl is the concentration worth reaching for, rather than stronger surgical spirit, because it dissolves adhesive effectively without being harsh enough to strip the oleophobic coating that keeps fingerprints from smearing across your screen. Higher concentrations work faster but at the cost of that coating over repeated use.
Don’t rush the reinstall. A screen that looks dry can still be carrying a thin film of alcohol, and trapping that under a fresh protector is a guaranteed bubble.
What mistakes cause the most screen damage?
Nearly every damaged screen protector removal traces back to one of a handful of avoidable habits.
- Metal tools of any kind. A scratched or chipped display from a knife or paperclip costs far more to fix than the protector you were trying to save cost to remove.
- Heating one spot for too long. Beyond a few seconds, you risk the adhesive underneath, the coating, or components near ports and cameras.
- Ignoring cracks in the underlying screen. If the glass panel itself has damage, not just the protector, removal attempts can make things worse. Stop and get it looked at by a repair service.
- Forcing a corner that hasn’t lifted. If it’s not moving after a card and a bit of heat, the answer is more patience, not more pressure.
Power the device off before you start every single time, no exceptions, even for a five second job.
A practitioner’s note on the mistakes we see most
The mistake we see repeated most often at SmartProtectors isn’t a bad removal, it’s a rushed reinstall straight afterwards. People clean the screen, then fit the new protector immediately in a room full of ambient dust, and wonder why there’s a speck trapped under the glass within minutes.
The simplest fix is steam. Run a hot shower for a few minutes beforehand, close the bathroom door, and let the humidity settle the airborne dust before you go anywhere near the new protector. It sounds unlikely, but it works because damp dust falls rather than floats. Our own installation guide walks through the squeegee technique that pairs with this, and if you do still end up with a stubborn speck underneath, our dust-fix guide covers lifting the edge just enough to clear it without starting the whole job again.
Replacing your protector? SmartProtectors has you covered
Once the old protector is off and the screen’s clean, you’ll want something reliable to put back on, and that’s where SmartProtectors comes in. The shop stocks tempered glass and film protectors, camera lens protectors, and the cleaning wipes and installation kits to fit them properly, across phones, tablets, watches, and more.

If your exact device isn’t listed, submit a request through the main shop and the sourcing team will track it down for you rather than leaving you stuck with a generic fit. It’s worth comparing tempered glass against hydrogel film before you buy, since the right material depends on how you actually use your device day to day. Browse the full protector range and get a replacement ordered before dust has a chance to settle on that freshly cleaned screen.
Sources
The step-by-step methods above draw on established guidance from Asurion, BGR, musicMagpie, ESR Tech, and Forbes.
- How to remove your screen protector | Asurion
- How To Remove A Cracked Screen Protector Without Damaging Your Phone | BGR
- How to remove screen protectors (without damaging your screen) | musicMagpie
- How To Remove A Tempered Glass iPhone Screen Protector | Forbes
FAQ
Can you reuse a screen protector once it’s been removed? Film protectors sometimes go back on if peeled off carefully and kept dust-free, though the adhesive weakens each time. Tempered glass rarely survives removal intact enough to refit properly.
What if the protector rips while I’m peeling it? A ripped protector isn’t dangerous to remove, just fiddlier. Work each remaining piece the same way, starting a fresh corner with tape or a card, and take extra care around any exposed adhesive edges.
Is it actually safe to use a hairdryer near my phone? Yes, on a low heat setting held roughly 15cm away in short bursts. The risk isn’t the hairdryer itself, it’s holding it too close or too long over one spot.
What’s genuinely the easiest method for most people? The tape-tab lift. Press a folded loop of tape onto a corner and pull. It works on the majority of intact protectors without needing a card or any heat at all.
Do I need gloves for a normal, uncracked protector? No. Gloves matter specifically when the glass is cracked or shattered, where sharp edges are a genuine risk.